Showing posts with label LTC. Show all posts

Monday, May 4, 2015

Pink

I used this stamp to demonstrate how to use chalks awhile ago.   Finally, I created a card with it.  This is for Long on top tracker.  The stamp was inked with Versa fine black ink.  I helped speed the drying up by using a heat gun to make sure that the entire image was dry. 
 
The stamp I used is 4x4.5  After stamping I cut the image down.
 
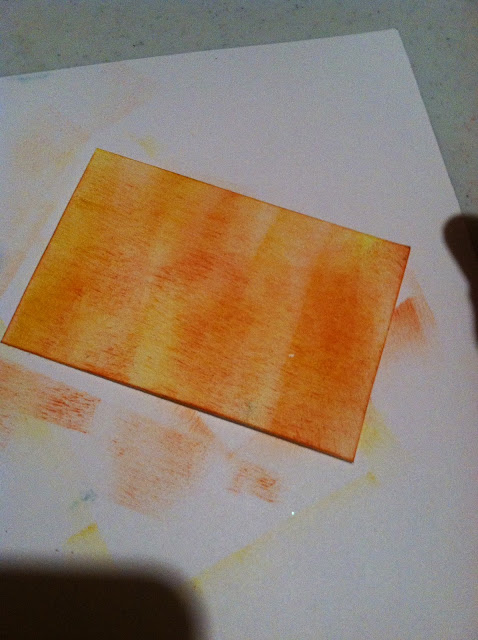
Completed card.  I used chalk on the entire card. 


This is the chalk pallet that I used.  No other inks or colors were added.


I get asked what I used to apply different mediums with.  So - he is the 2 applicators I used for the chalk.
  I purchased these at dollar general.


Saturday, February 28, 2015

Gesso- stop to feel the music


I love gesso. Almost every card I make has it -  sometimes with texture and other just plain.  I love how the color react to having the gesso behind them.   I had this image for a very long time. I stamped it, cut it down so you only feel the emotion of the eyes.  This card has 3 different gesso techniques.  The back ground is not only a raised texture, but also a tinted gesso. After that layer dried I added another thin layer of white and ghosted it with several mini stamps to catch the resin. Then I used gesso that I thinned down, stained with ink and added some eye shadow to get an underneath shimmer (does not show up in the photo). After everything dried I then used a wide paint brush and coated it with wet perfect pearls to give the streaks that make the card feel light.  I added the music tape and coated it all with an acrylic coat.

Thomas the train tracker


My little guy loves trains, trains of all kinds, however, he really loves Thomas the train. When a wonderful friend sent him a Thomas the train stamp I knew I need to make a card with it.  So the tracker was born.


This stamp was carved by FORAYCH.  Awesome carve. 

This is Hiro and Thomas.

Bertie 

All the cards have been framed and hung on his wall.  


Painted owl

I was invited to join the painted owl tracker. I was excited to hand paint my owl. I used water colors on the tree. (The actual carve has a tree wrapped around the owl.)  I used ink blocks to paint the owl and acrylic paint to give a dimension to the eyes. Since every step had to dry individually, I coated each area with liquitex satin varnish after it was dry. Once complete the entire card was coated with liquitex high gloss varnish. 


Saturday, November 29, 2014

O Holy Night


This was carved on SLQ,  A fun card for the Holiday Spirit tracker. This started as white paper.  The back is layered distress inks used to emphasize areas of the stained glass. The stained glass image was colored using  inks and water colors.   While the inks were wet a layer of distress candy coat was added.  I then used a squeegee to wipe most away leaving a thin layer of the paint.  Since the inks were wet it helped bleed some of the colors and add depth to the card.  The 2 layers were edged in black and glued together with rubber cement.  After applying the rubber cement to both the front of the back paper and the back of the window I let it dry and then put the pieces together to make a permanent bond.


Friday, November 21, 2014

A special treasure by topcollector

Topcollector sent me a special LTC in the mail.  I am so drawn to the fabric and thread.  So this was a great treat!

This jewel is called:
Stitched: Spinning Tops Quilt Block
Counted cross stitch and embroidery.

Let's start with just the card- this is delightful to the eye.
The colors of this card as very pleasing to the eyes. The red and green have a peaceful cheer that is not too powerful. The card is red and green- usually I think of Christmas time, but the muted colors give the feel of spring.  (However- I plan to add it to my Christmas frame for the up coming holidays because I really like it)

The front of the card is a beautifully stictched square.


The back shows the original stamp.  


The embroidery is tightly stitched making a perfectly smooth cards.  The cut corners make a romance feel to the card. The subtle blending of papers is remarkable as the is no paint or ink involved.  

The only thing that would make this better is if I hade 8 more to make a wall display of these little treasure of quilt blocks.   I absolutely love this card!

Big cheers to topcollector for sharing beautiful art with me, love the special surprise!

Wednesday, October 29, 2014

I see


For colorful bird tracker

Ruminant


All the papers were white to begin with. Inks, dyes, markers, stamps helped to make the colors.


Monday, October 27, 2014

Stacked high.


Used alcohol inks, toothbrush to speckle, distress markers, coated with hard candy. Glued together with rubber cement. For a Christmas tracker.

Sweet innocence.


2 complimentary papers, distressed markers used with a water pen and blending tool on the edges. Glued together with rubber cement.


For the where the wild things are tracker

Friday, September 5, 2014

Tuesday, September 2, 2014

Butterfly Fish


For the what is in my aquarium tracker.


We have a virtual fish tank that my son is learning on.  This is his favorite fish.  His name is zebra.

Tuesday, August 12, 2014

Dollar Tree eraser - review


I was generously sent this eraser and asked to do an honest review of it.  It came from dollar tree (cost $1.00).  Apparently it comes in many different designs. This one happens to be a sweet cake of some kind.


Close up of the front

This is the back of the eraser.  As you can see it will need work before carving.

I used Acetone to remove the writing - the painted cake is on the other side.  You can see eraser left overs from rubbing the material.  I was hoping this was just from treating the material with acetone to remove the writing. That was not the case.  I dealt with those the entire carve.

To finally get a smooth crumb free area.  I took a rag with acetone and laid it over the top and gently wiped the material. This took a few minutes.

After letting the material sit until it was no longer wet or tacky (30 min.) I transferred an image using acetone.  I did not dare try anything else as I finally have a clean area.

Ready to carve
I started off with a 1v gouge around the outside.  It was a "getting a feel for the material."  I also started with an exacto knife.  The knife did not cut this material well at all.  The eraser does not have a constant consistency to it.  I found hard areas in the block. You can see on the picture that there are jagged cuts where the blade went around something in the material.

I grabbed the gouge.  I tried to show some markings in the material.  In some areas the gouge slid right through, but in others it skipped. 

Here is the printed stamp.  It you can really see the jump marks and issues right away.

Personally this is a terrible carve for me and I am embarrassed that I could not get a cleaned cut not matter how hard I tried.  It is extremely rubbery.


Summary:

You can carve this material.  This would be a great block to learn your tools on as long as you eventually move to aother.  I have been carving both wood and rubber for over 10 years and struggled to get clean lines.  My fear would be that if someone stayed on this material they might get discouraged that their carvings are not getting better.

This material will hold up well in the heat.


This material might be good to make background shadows for LTCs as it hold ink well.


Monday, August 4, 2014

Small Cross LTC


I was asked how I make contrast and why I use more white paper than others.

First off I use white card stock. Although I do add other papers to my work I enjoy the simplicity of working with white.  It also is easier to use up scrap papers.

The following card is all white except the blue/purple paper in the back.

Here is my finished work


Here is how I reached it:


I did not take a pic, but I spritz this piece too and added red ink to the sides with an ink pad.


A super quick carve on pink block.  

Stamped image


Using the same inked pad (I did not add any ink) I started on the side and spread it towards the middle.

Soaking up the left over spray.


This is very messy so I used pliers.

All 4 sides covered.

Dabbed a bit of red on.


Using a chalk dabbed to add just a tad bit of aqua blue.


Defining the sides

You can see the difference between the sides with and without the black. I usually do a dark on all the side so no white shows


Glued together.