Friday, November 14, 2014

Compare inks and chalk colors


Rub on the chalks with your applicator- I am using a makeup applicator, but q-tips work too.


Chalk on the left and distress ink on the right.  The chalk will have to be sprayed to be sealed.  The ink needs to dry.  Same colors, similar looks.   The chalks will blend where you put them. The inks blend but are more limited.


Chalking with the perfect medium


Perfect medium stamps clear, but for it to show up in pics I dipped my stamp in black in and stamped it a few times before stamping the pad.


Once the ink dries - I heat it, but you can let it air. Just take an eraser and erase what you don't want.  This is a great way to create your own background papers.


I use this trick with dollar store eyeshadow or sidewalk chalk I break down.  When I am done I spray with a chalk sealer or acrylic gloss spray.  


Thursday, November 13, 2014

Just an image hanging around.

Sometimes you find an image and you can see many uses.  This is one of those.  I can make back grounds. Use just part of the stamped image.  

Wednesday, November 12, 2014

Just for fun


We all have to deal with our issues in our own way.  So I carved up a stamp and went to town.  I made 9 cards, all the same with slight differences.  So here is my card so far.  I sent it to some friends (who are so much more creative and talented than I).   I may be adding doing some editing, but wanted to show where I stood.

Versafine- black, blending tool, distress inks, water brush are the tools used.


Tuesday, November 11, 2014

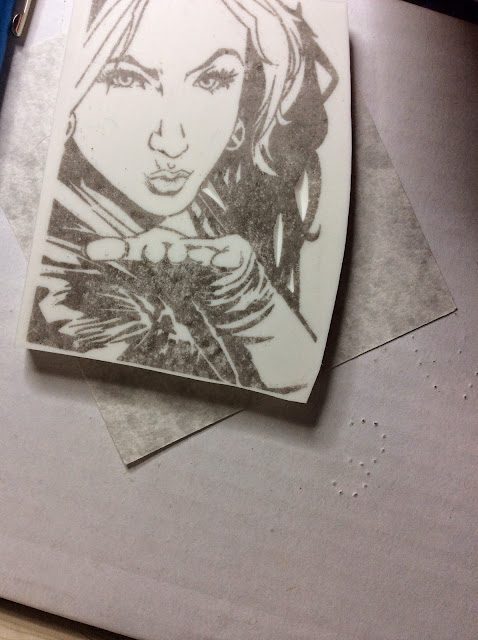
Needle carving completed

So I made a needle cutting tool, showed how to use it- here is the completed stamp.


I cut the image out with a needle and used a gouge to clean up the large areas

After it has been carved I rinse it off really well I. Warm water. Dried it on a paper towel over night.

Now I have to edit.  The right eye looks good, but the left eye has an area by the eyebrows that I will need to think about it.  The original has those markings.  So before I take my knife back to this image I am going to ink it up a few times and see what I get.

Saturday, November 8, 2014

Needle carving


Here is my transferred image. 16 gauge needle made on earlier blog and a transfer on SLQ carving block


Making a few quick cuts

This is the angle I cut this at

Different view


Making a needle cutting tool

BE CAREFUL! 
Work with tools at your own risk!
You will need a wire cutter and a pair of pliers that have a flat area

This is how the needles come.  No syringe attached. (You can purchase them that way, but this is cheaper)
It is possible to find 1 1/2 inch long needles, but I will use a 1 inch one as they are easier to find.
Look at your local farm store, usually by the animal medications.

To open the needle just twist the seal.  It will break.  This is what it looks like once open.

I highly suggest using a piece of scrap rubber.  Put the sharp point down into the material. I usually push it about 1/2 in.


Make sure that the needle is in firmly.


Take your wire cutters and cut as close to the end as possible.  I tend to hold the rubber with one hand and the wire cutters with the other.  I close my eyes as I have had the other end fly away a few feet on my table.

A

This is what your needle will look like in the rubber.  Throw all the other piece in the trash.  Notice how the end in pinched some on the ends?  fixing that is next.

Use the flat area of your pliers and squeeze making it as round as possible,  The reason for doing this is  it can catch in the pin vise. 


It rounds out really easy and fast.  Use gradual pressure.

Here is a comoparision to show size. On the left is a gouge carving tool the right is a type of pin vise.  It actually comes with tiny drill bits.  (I bought mine at Hobby Lobby) There are others, but this is the most comfortable for me.

Twist the silver color ring and it opens the top. Slide the end of your needle in and tighten it up.

Here is the needle in the pin vise.


When I pull off the rubber piece you can see the sharp point of the needle.

A different angle of the blade

Marked the gauge and it is ready for storage in carving tool area.